


February Giant Block Tutorial
I hope you all enjoyed the January block because it is already February.
 The instructions for making this block can be found as a free download in my shop.
Piece together the quilt with the blocks on-point. If you are unfamiliar with on-point quilts, check out this great tutorial.

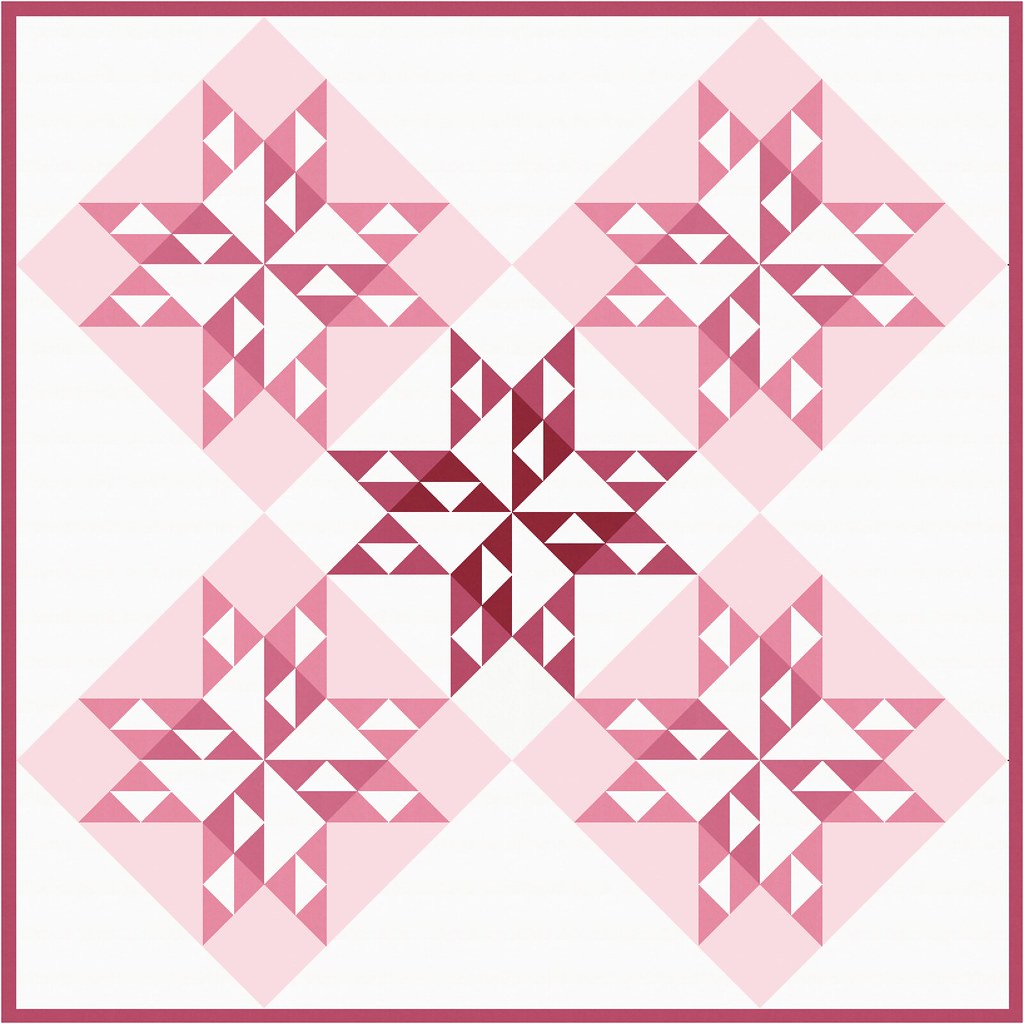
Meet the February Block. Just like last month's block, there are instructions for 24" and 36" versions and a couple of examples on how to use the blocks to make your own Giant Block quilt.
24" Block Quilt Idea
This quilt finishes at 68" x 68." To make this quilt, you will need to make (5) of the 24" blocks.
Corner triangles: Cut (2) 18" background fabric squares. Cut along one diagonal to make (4) corner triangles.
Side triangles: Cut (1) 35.25" background fabric square. Cut along both diagonals (in an X shape) to make (4) side triangles.Piece together the quilt with the blocks on-point. If you are unfamiliar with on-point quilts, check out this great tutorial.
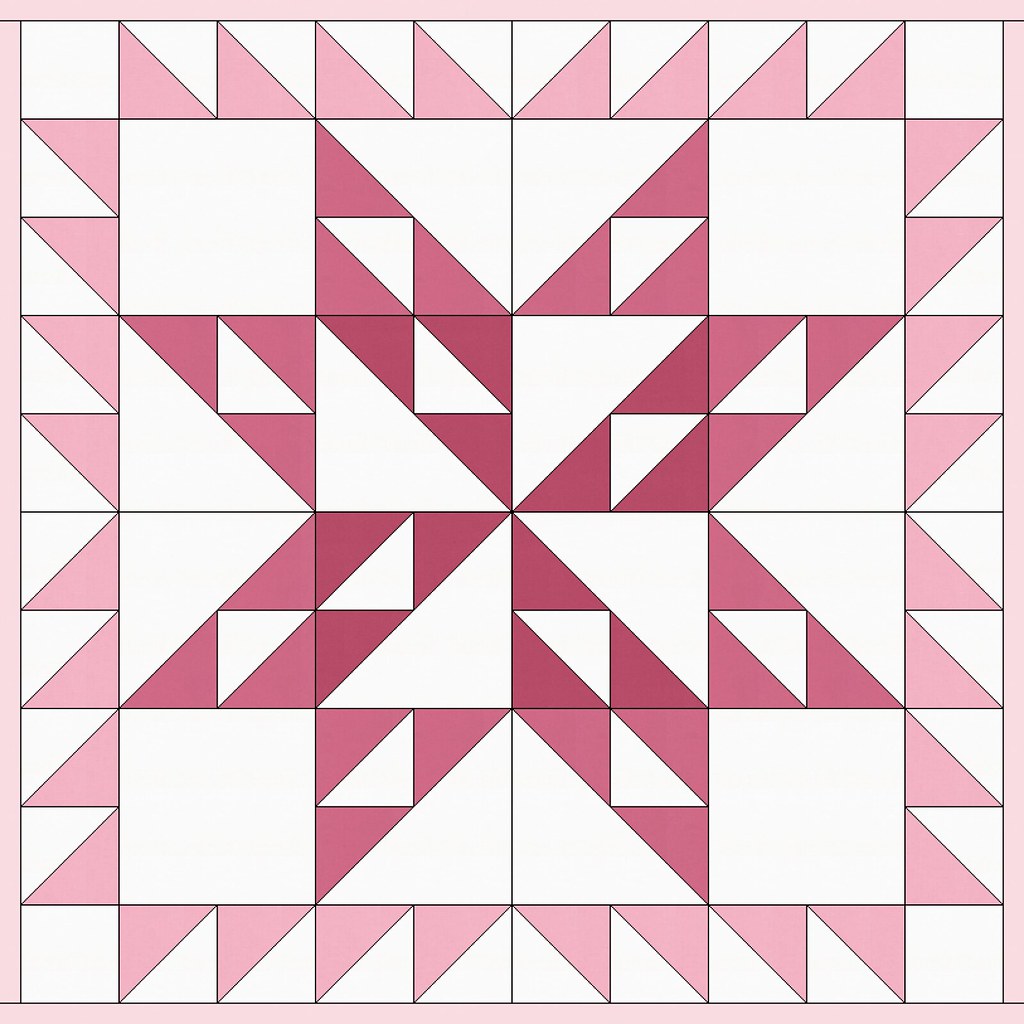
36" Block Quilt Idea
This quilt finishes at 45" x 45" and is super quick to put together. Note: the block below shows the binding to help outline the edge of the quilt
You will need to make (1) of the 36" blocks and (32) 4.5" x 4.5" HSTs. You will also need (4) 4.5" x 4.5" squares of the background fabric for the corners.
After you piece together your 36" block, add a border of HSTs.
I hope you have enjoyed the tutorial! If you make a block or a quilt using these instructions, I would love to see a photo! You can use the hashtag #GiantBlockTutorialSeries on Instagram or send me a photo or a link to your project. I will be pinning all of the projects to the Giant Block Tutorial Series Pinterest Board.
You can download a printable PDF of all of the Giant Block Tutorials (for free) in my shop.
Nia on
How much fabric does the march block take please?
Elaine on
I’ve just spent the last several hours lost in your “Big Block” tutorials. Thank you so much for doing these !!